Worksheet 15
Contents
Worksheet 15#
Authors (3 maximum; use your full names): BLANK
In this worksheet, we will use a random forest classifier to classify handwritten digits.
When we used a single unconstrained decision tree in the Week 8 videos, we got a test accuracy of 88%. That is already a good performance, but we will be able to do better using a random forest.
Question 0 - Setting up the workspace#
Make sure you are working in a (free) Pro Deepnote workspace; see the Worksheet 0 instructions. The computations are more memory-intensive than usual in this worksheet. It should say “Pro” or “Education” in the lower-left corner.
Question 1 - Loading the data#
Load the handwritten digit dataset by executing the following code. (Warning. This dataset is bigger than all of the other datasets we’ve used in Math 10. If you run this code multiple times, the system may restart.)
from sklearn.datasets import fetch_openml

mnist = fetch_openml('mnist_784')
How many input columns are there? How many data points are there? (You might want to review the Week 8 videos for reminders about this dataset.)
Convert the pandas DataFrame
mnist.datato a NumPy array by using theto_numpymethod. The entries are all positive integers between 0 and 255 (inclusive), so convert that NumPy array to an unsigned 8-bit integer dtype by using the NumPy array methodastypewith the argumentnp.uint8(be sure you import NumPy). Name the resulting NumPy arrayX. (Having to make these NumPy conversions is a little strange. I’ll point out below which step requires the conversions.)
Convert the pandas Series
mnist.targetto a NumPy array again by using theto_numpymethod, and again convert the data type to unsigned 8-bit integers. Name the resulting NumPy arrayy.
How many bytes is
X? Use thegetsizeoffunction from thesysmodule. Make the number easier to read by using an f-string and including commas:print(???"The NumPy array X is {???:,} bytes."). This is significantly bigger than our usual datasets (but it still probably does not qualify as “big data”).
Divide
Xandyinto a training set and a test set,X_train, X_test, y_train, y_test, by usingtrain_test_splitwith atrain_sizeof0.8and arandom_stateof0.
Check your answer:
y_testshould be a length 14,000 NumPy array with adtypeofuint8. The first three values iny_testshould be0,4,1.
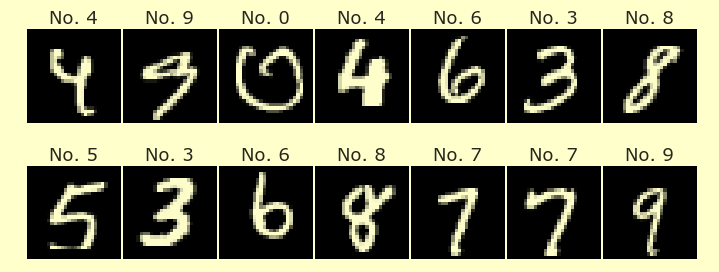
Question 2 - Displaying a handwritten digit#
We just saw that
y_test[1]corresponds to the digit4. Display the corresponding handwritten digit fromX_testusingax.imshowwhereaxis a Matplotlib Axes object. Again, see the Week 8 videos for a reminder of how to do this. You will need to usereshapebecause the original handwritten digits are 28-by-28 pixels, whereas they are stored inX_testas one-dimensional NumPy arrays of length \(28^2 = 784\).
Question 3 - Fitting a random forest classifier#
In the third Week 8 video, we used a decision tree classifier with no restrictions and got a test accuracy of 88% (meaning 88% of handwritten digits were correctly identified). Your goal in this question is to get a test accuracy of at least 92% using a random forest classifier.
Import the
RandomForestClassifierclass from scikit-learn’sensemblemodule.Create an instance of this class and name it
rfc(for random forest classifier). Experiment with different values ofn_estimators,max_depthand/ormax_leaf_nodes. Also userandom_stateto get reproducible results. Fit the classifier to the training data. Try to find values which yield a test score (rfc.score(X_test, y_test)) of at least0.92. (Warning. Start with small values and work your way up. If you start with even medium-sized values, the computer may run out of memory and you will have to restart the notebook. Thefitstep for my values took about 20 seconds.)
Question 4 - The individual trees in the random forest#
What type of object is
rfc.estimators_?What is the length of
rfc.estimators_? (This and the following questions will only work if you have fitrfcin the previous step.)How does the length of
rfc.estimators_relate to the parameters you used above?What is the type of the zero-th element in
rfc.estimators_?Using list comprehension, make a list
score_listcontainingclf.score(X_test, y_test)for each classifier inrfc.estimators_. (This is the step that would not work if we didn’t convert to NumPy arrays above.)What is the maximum value in
score_list?How does this result relate to the expression, “greater than the sum of its parts”, or to the phrase, “the wisdom of crowds”?
Question 5 - A DataFrame containing the results#
We now return back to rfc.
Make a pandas DataFrame df containing two columns. The first column should be called “Digit” and should contain the values from
y_test. The second column should be called “Pred” and should contain the values predicted byrfcfor the inputX_test. (Reality check:dfshould have 14000 rows and 2 columns.)
Question 6 - Confusion matrix#
Begin making a confusion matrix for this DataFrame using the following code. This code consists of two Altair charts, a rectangle chart and a text chart. For now it will look a little strange.
import altair as alt
alt.data_transformers.enable('default', max_rows=15000)

c = alt.Chart(df).mark_rect().encode(
    x="Digit:N",
    y="Pred:N",
)

c_text = alt.Chart(df).mark_text(color="white").encode(
    x="Digit:N",
    y="Pred:N",
    text="Pred"
)

(c+c_text).properties(
    height=400,
    width=400
)
Specify that the color on the rectangle chart should correspond to
"count()", and use one of the color schemes that seems appropriate, as inscale=alt.Scale(scheme="???")). (Don’t use a categorical scheme and don’t use a cyclical scheme. Try to find a scheme where the differences among the smaller numbers are visible.)You can also add
reverse=Trueinsidealt.Scaleif you want the colors to go in the opposite order. Feel free to change the text color from white if it makes it easier to see.Change the text on the text chart from
"Pred"to"count()".
Question 7 - Interpreting the confusion matrix#
Use the above confusion matrix to answer the following questions.
What is an example of a (true digit, predicted digit) pair that never occurs in the test data? (Hint/warning. Pay attention to the order. The “Digit” column corresponds to the true digit.)
What is the most common mistake made by the classifier when attempting to classify a 9 digit?
Does that mistake seem reasonable? Why or why not?
Try evaluating the following code. Do you see why the pandas Series it displays relates to the confusion matrix?
df.loc[df["Pred"] == 9, "Digit"].value_counts(sort=False)
Question 8 - Feature importances#
In general, random forests are more difficult to interpret than decision trees. (There is no corresponding diagram, for example.) But random forests can still be used to identify feature importances.
Call the
reshapemethod on thefeature_imporances_attribute ofrfcso that it becomes a 28-by-28 NumPy array.Visualize the result by using the following, where
???gets replaced by the 28-by-28 NumPy array. (Here we are using the standard name ofpltfor the Pyplot module.)
fig, ax = plt.subplots()
ax.imshow(???)
Why do you think the pixels around the perimeter are all the same color?
Question 9 - An incorrect digit#
Find an example of a digit in the test set that was mis-classified by
rfc. (Hint. Start by usingdf["Digit"] != df["Pred"]. Then you could for example use Boolean indexing, or you could convert to a NumPy array and then use NumPy’snonzerofunction, which will return a length-1 tuple whose only element is a NumPy array containing the integer locations where the value isTrue.)Display the mis-classified handwritten digit using
imshow.Display the true value (from
y_testor fromdf["Digit"]).Display the predicted value (using
rfc.predictor usingdf["Pred"]).Does the mistake by our random forest classifier seem reasonable? (Some will, some won’t. Find an example where the mistake seems reasonable.)
Reminder#
Every group member needs to submit this on Canvas (even if you all submit the same link).
Be sure you’ve included the (full) names of you and your group members at the top after “Authors”. You might consider restarting this notebook (the Deepnote refresh icon, not your browser refresh icon) and running it again to make sure it’s working.
Submission#
Using the Share button at the top right, enable Comment access level for anyone with the link. Then submit that link on Canvas.
 Created in Deepnote